Activity: Consume server with Visual Studio Code
For this exercise, keep using the hello-mcp server that you created in the previous exercise or clone an existing repo here:
git clone https://github.com/softchris/mcp-workshop.git
cd mcp-workshop
For a server built with stdio you need to do the following at high level:
- Create an mcp.json file in
.vscodefolder - Enter absolute path to the server
- Start the server via the JSON file
- Run the tool via GitHub Copilot chat
To do this, follow the steps below:
- Create a
.vscodefolder in the root directory of your project and add amcp.jsonfile in the.vscodefolder. - Start the server via the JSON file.
- Run the tool via GitHub Copilot chat.
Create a config file
The config file is used to configure the server. It can contain both input, and server configurations.
We need a folder for our configuration file.
- TypeScript
- Python
-
Create a
.vscodefolder in the root directory of your project and add amcp.jsonfile in the.vscodefolder.mkdir .vscodeNext, we need the actual configuration file.
-
Create a
mcp.jsonfile in the.vscodefolder with the following content:{
"inputs": [],
"servers": {
"hello-mcp": {
"command": "cmd",
"args": [
"/c", "node", "<absolute path>\\build\\index.js"
]
}
}
}The path to your server should be the build folder. To find the path, run the following command in the terminal:
pwdThis will give you the absolute path to your project. You can then copy the path and paste it in the
mcp.jsonfile.
-
Create a
.vscodefolder in the root directory of your project and add amcp.jsonfile in the.vscodefolder.mkdir .vscodeNext, we need the actual configuration file.
-
Create a
mcp.jsonfile in the.vscodefolder with the following content:{
"inputs": [],
"servers": {
"hello-mcp": {
"command": "cmd",
"args": [
"/c", "node", "<absolute path>\\server.py"
]
}
}
}The path to your server should be the build folder. To find the path, run the following command in the terminal:
pwdThis will give you the absolute path to your project. You can then copy the path and paste it in the
mcp.jsonfile.
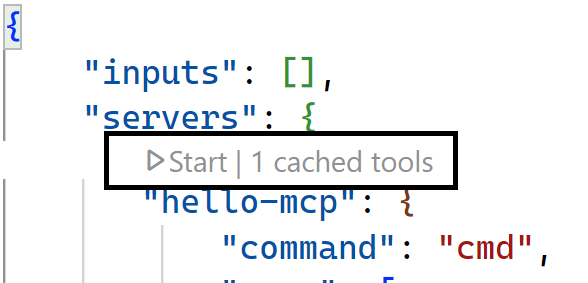
Start the server
To start the server, open the mcp.json file in Visual Studio Code and click on the play button.
Run the tool via GitHub Copilot chat
Now that the server have hopefully started up, let's use it.
- Click tools icon to bring up a list of tools
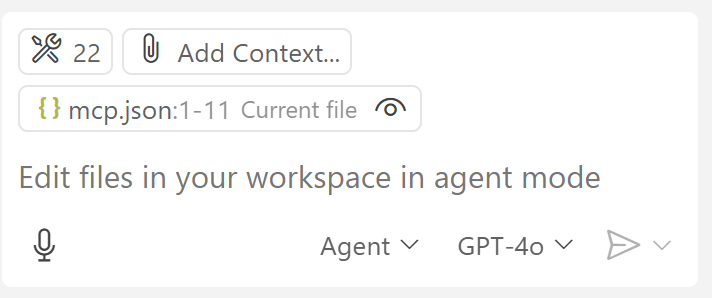
- Inspect the tools result list, your server should be listed there.

Run the tool
-
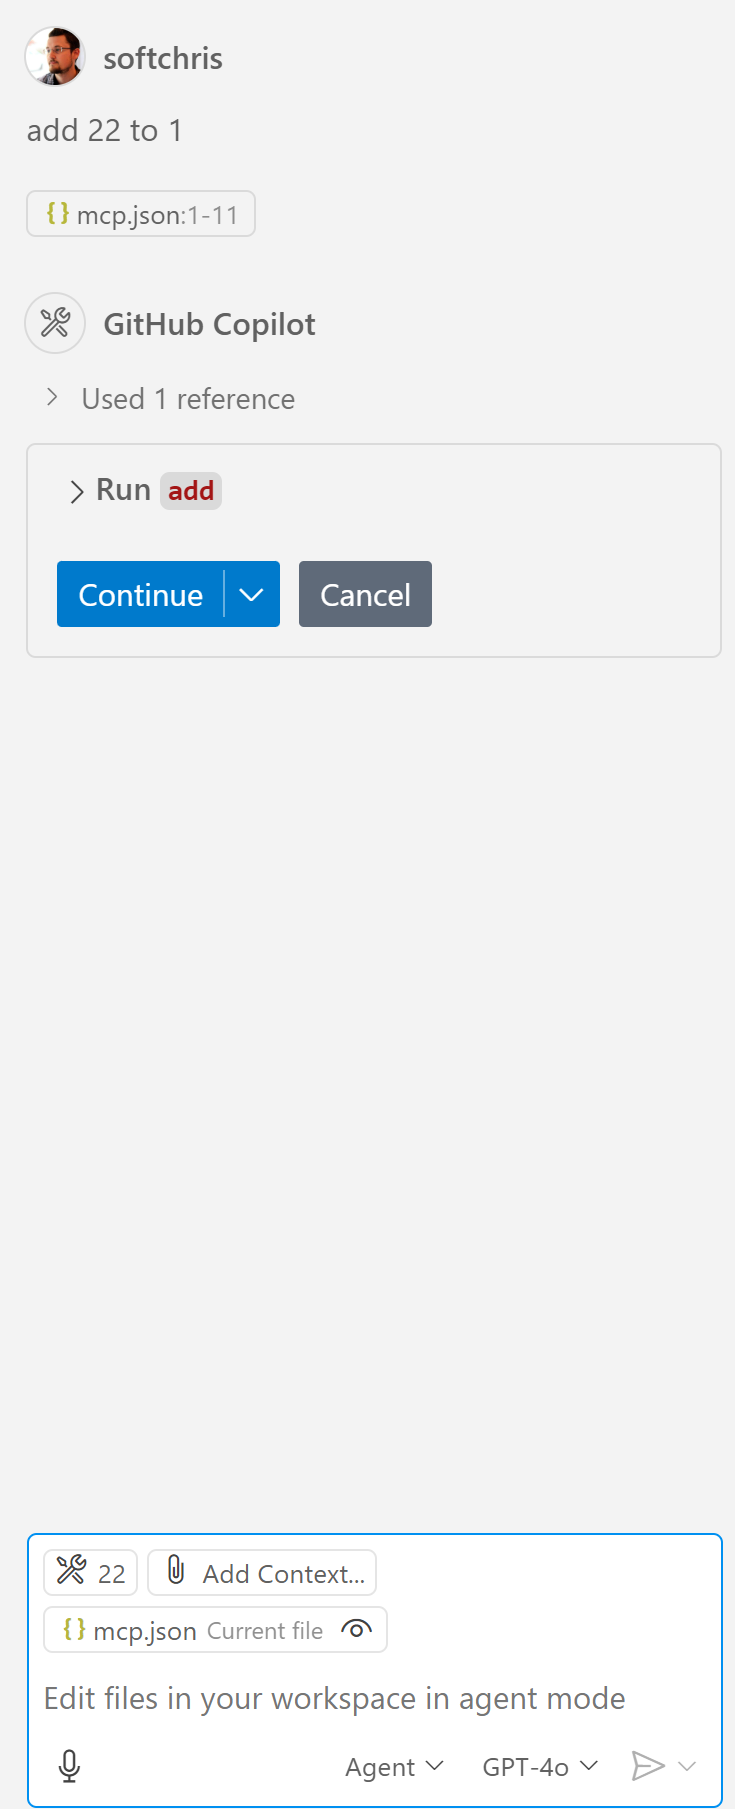
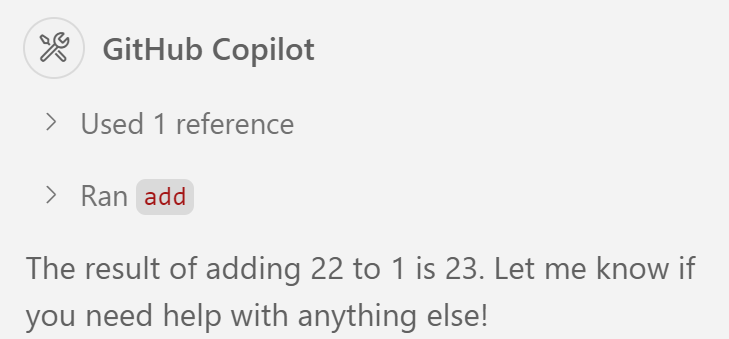
To run the tool, type a prompt in the chat like so:
add 22 to 1You should see a result like so indicating that you allow the agent to run the tool:
-
Click the down arrow to expand the tool and see the arguments that are passed to the tool.
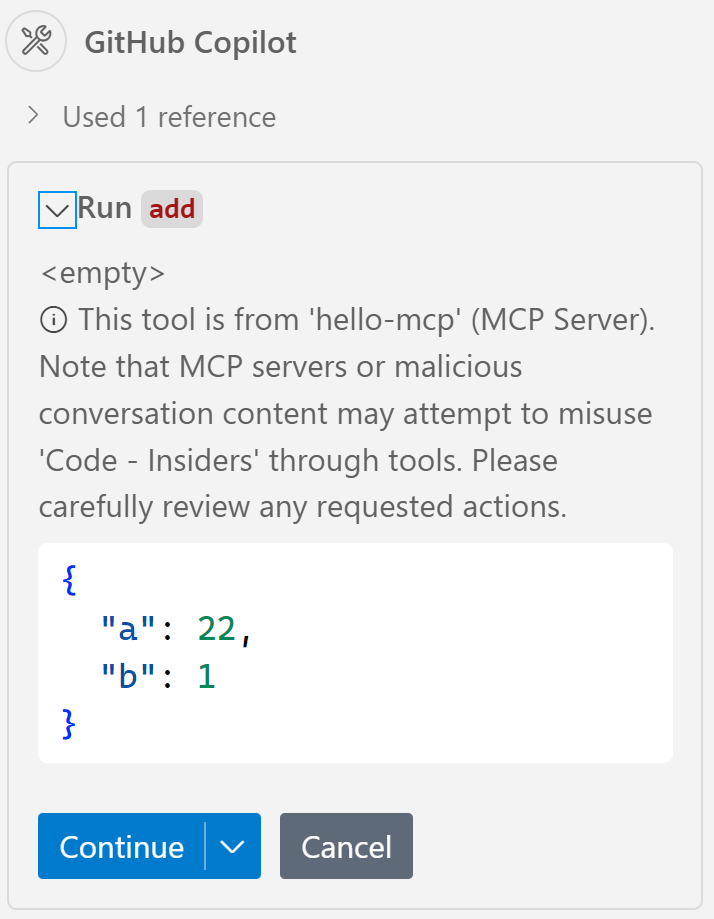
Here you can see what server the selected tool is running on and the arguments that are passed to the tool.
-
Click on the "Continue" button to run the tool.
You should see a result like so:
Summary
Congrats, you've managed to consume a server with Visual Studio Code and run a tool via GitHub Copilot chat!